
Hello folks! Sorry I had to go on a short hiatus but I’m back with a fun post for you. Ok, so I’ve been getting a lot of questions on how I make my cake pops, what I do, etc. And after the baby shower cake pops I made a few days ago, I promised to do a blog post with details on how to make them. Earlier this year I set out on a quest to learn how to make cake pops. I kept seeing them everywhere and everyone kept talking about them. But I had only had some from one person that were really good, and apparently the ones at Starbucks are “nasty” (not my words, but the words of my friends who have tried them). I figured since I have little ones, I needed to learn how to make them (especially since they can be really expensive to buy). I did a lot of research on cake pop makers and the like, but there were a lot of reviews that didn’t make me eager to put down any money on one.
Then I went to a friend’s baby shower and her friend had made some cake pops…two words: Ah-mazing! I immediately asked her how she made them and what she used. She was the first person I had ever talked to that actually made them without the cake pop maker which excited me even more! So when I got home, I immediately consulted with Madame Google on how to make them by hand. I went through a lot of blogs and YouTube videos until I found one that laid everything out perfectly. So before I share that magical link that changed my cake pop-making life forever, let me start by saying this is for beginners only…not for the pastry chefs or the Bakarella’s of the world. I keep it simple and do not make animal or movie character cake pops. I just don’t, and not sure if I ever will.
Tips & Tricks for Easy Peasy Cake Pops:
After my first stab at making my own cake pops, I did have a few trial and error observations that I wanted to share with you.
 1. I made some cake pops for my son’s preschool class on his birthday and I wanted them to be green but I didn’t have food coloring. But what I did have, was some green sprinkles, so I mixed those in with the cake batter to make the cake green. He loved it and was so excited when he bit into it. LOL. It added a nice element of surprise. For the ones I made for my daughter’s birthday (pictured below), I used sprinkles in the batter to make a funfetti cake pop.
2. Make sure you have plenty of room in your fridge for them as you will need to store them in between dipping, and again once they are decorated.
3. The chocolate candy melts (especially white choc) burns easily. If you use a microwave make sure to follow the melting directions on the back of the bag. If you use the stove top (which I do) then just make sure it’s on a low setting.
4. When I first made these delicious treats, I could not understand why the chocolate clumped up so easily and didn’t have the smooth consistency I saw in videos and pictures online. I realized that I had missed one of the most important ingredients, which is the Crisco. This little trick of adding a spoonful makes it SO much smoother and easier to coat the cake pops.
5. If it starts to clump at all as you’re coating them, the chocolate might be too hot, so let it cool just a little bit and try again.
 6. AC Moore and other craft stores that sell the candy melts, sell them in absolutely every color imaginable. So I’ve never used food coloring for the coating of the cake pops. And the colors can change with the season which is great.
7. I’ve never used Devil’s food cake mix either. I prefer Duncan Hines yellow or red velvet cake mix, so that’s pretty much what I use all the time.
8. If you want to give them as favors or gifts, then you will also need to purchase clear plastic treat bags and twist ties to put the cake pops in once the chocolate has finished hardening.
9. When you’re putting the cake pops on styrofoam to harden, you can get more of them on there if you use alternating sized lollipop sticks. I use the 6 inch and 4.5 inch sticks. They sell all of these items at AC Moore and other craft stores (I just get everything from ACM).
 10. Last but certainly not least: have patience! They can be time consuming, depending on how many you’re making (one box of cake mix will make about 30-35 cake pops depending on size). TIP: space it out in two days. Bake the cake two days before you actually need the cake pops. Let the cake cool, form the cake balls and place in the fridge overnight (covered). Then all you need to do on the second day is decorate them.
Ok, so if you’re ready to join in on this phenomenon of the cake pop craze, click here: Easy Cake Pop Directions.
I will leave you with some more pictures of the cake pops I’ve made, so you can also see the different colors I’ve used and just maybe get a little inspiration of your own. 🙂
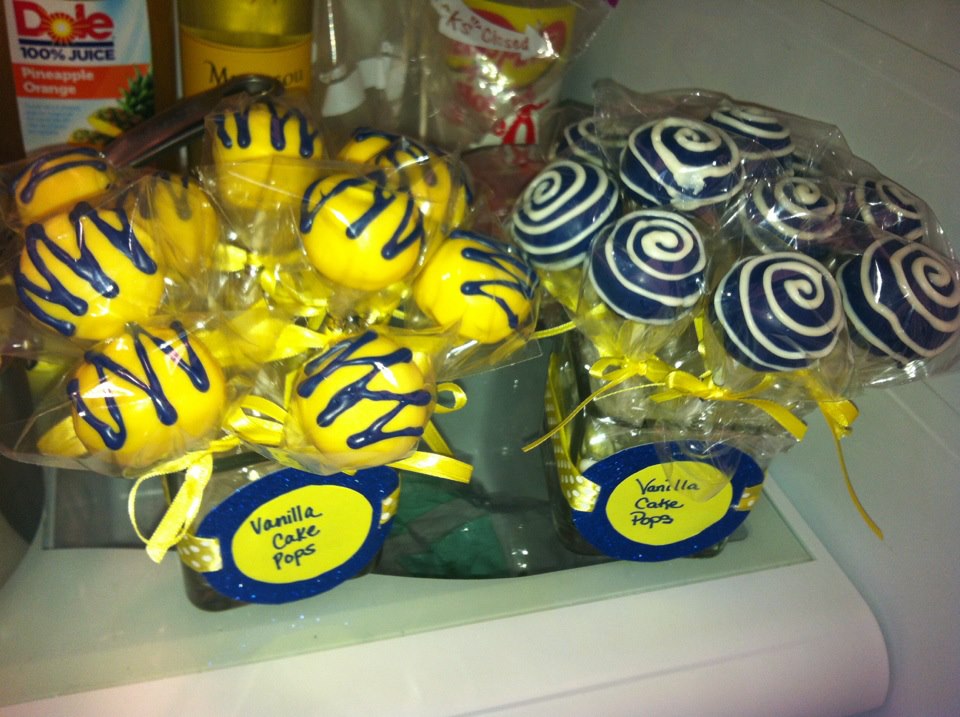
 For my best friend’s (now my sister-in-law) bridal shower, I wanted to have a dessert buffet. The colors were royal blue, yellow and pops of pink:
I even had a really good friend of ours make a blue velvet cake from scratch. That cake was absolutely delish! And it complimented the sweet treats table very well.
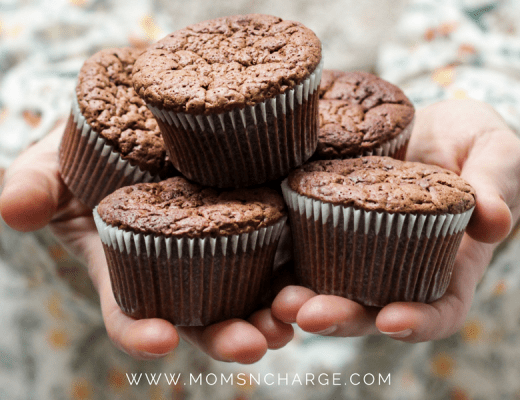
In the buffet we had, cake pops (duh!), brownies, cookies, mini cupcakes (also delish and made from scratch by another good friend), lemon heads, strawberry jelly bellies, personalized water bottles (ok, not really a sweet, but we needed something to wash down all that sugar!), chocolate covered pretzels, and doughnut bling rings (got the “diamond” toothpicks on Etsy).

And here are my babies I made for a baby shower this past Sunday for a dear friend of mine. She is having a baby girl, so I used the yellow cake mix and added a little bit of red food coloring to get the pink cake. The theme of her baby shower was “sweet pea”, which is all the info I had to go on when making these cake pops. I was happy to see that they complimented the cake very well. The cake was absolutely AD.OR.AB.LE!! And I love when things taste just as good as they look. It was so yummy I ate two slices, and then took a piece home…for the kids of course!
I made this cake pop stand out of styrofoam and have used it a few times now. All I do is change the color ribbon to go with whatever color I need. I am thinking that I will have to learn how to make one out of wood though, because this stand is on it’s last leg.

But seriously: how ca-yute is this cake?!?!?!
 And here is a close up and the making-of these yummy treats! That’s all I have for now. Go on and make your own cake pops and come back and let me know how they turn out! I’d love to hear from you.


6 Comments
Chasing Joy
October 24, 2012 at 1:58 AMWow! They look really good. I definately don’t consider you a beginer any more. Maybe I’ll try to make them too.
Christine St.Vil
October 24, 2012 at 3:41 AMAw thank you!! Yay! Yes, you should definitely try them at least once. The fun part comes in doing the taste testing 😉
Drea
November 4, 2012 at 2:53 PM*stares at screen trying not to drool on the keys* I want cake pops!!
Taisha King
March 20, 2014 at 10:41 AMI need to get price quotes for my order forms I'm just starting my cake pop business if you can help
taisha
March 20, 2014 at 6:43 AMI need to get different quotes for my cake pops I’m just starting my business each cake pop is $2 I need to make a package deal but do not know what I should charge for package deals
Christine St.Vil
March 24, 2014 at 12:19 PMHi Taisha,
I think that is really up to you. You should start with some market research in your area as well as what other people/businesses are charging for cakepops. I only make them for fun and not for business 🙂 congrats and good luck to you!